Club Car Charger Manual: Troubleshooting & Repair
This comprehensive guide empowers owners to diagnose and resolve Club Car charging issues, saving time and money through a step-by-step approach to repair.
Club Car’s charging systems have evolved, particularly with the introduction of the On-Board Computer (OBC) in 1995 for 48-volt models. This OBC intelligently regulates battery charging, initiating and terminating the process based on voltage levels. Understanding this system is crucial for effective troubleshooting. Historically, simpler chargers were used, but modern carts rely on a sophisticated interaction between the charger, OBC, and battery pack.
Proper charging ensures optimal battery life and performance. A malfunctioning system can lead to reduced range, premature battery failure, and inconvenient downtime. This manual will guide you through the intricacies of these systems, enabling you to identify and address common problems efficiently.
Understanding the On-Board Computer (OBC)
The On-Board Computer (OBC) is a vital component in most Club Car golf carts since 1995, specifically 48-volt models. It acts as the brain of the charging process, monitoring battery voltage and communicating with the charger. The OBC dictates when charging begins and ends, preventing overcharging and maximizing battery lifespan.
A non-functioning OBC is a frequent cause of charging issues. Error codes displayed by the OBC provide valuable diagnostic information. Resetting the OBC can sometimes resolve minor glitches, but thorough testing is essential to confirm its functionality. Understanding the OBC’s role is key to pinpointing charging problems.
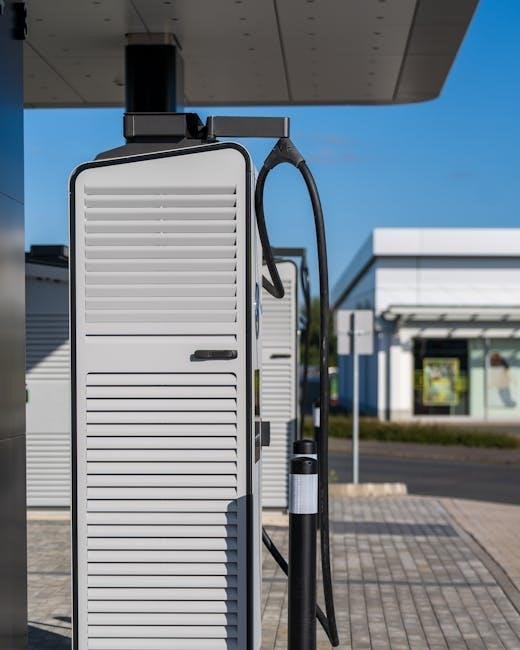
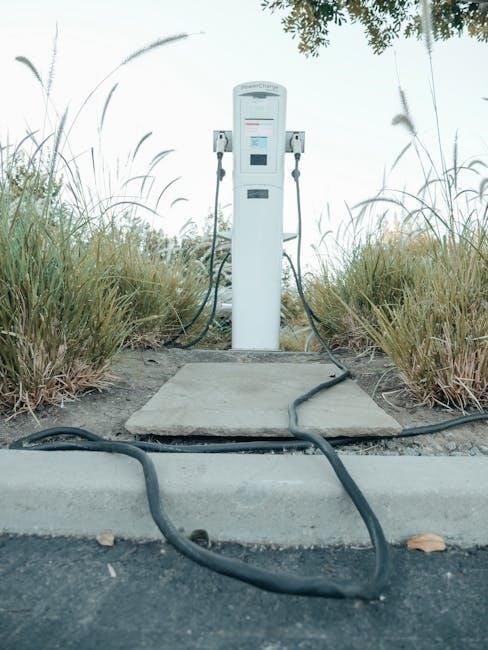
Charger Types for Club Car Golf Carts

Club Car utilizes several charger types, each designed for specific battery voltages and cart models. Standard chargers are commonly used for daily charging needs, while quick chargers offer faster charging times, ideal for frequent use. Newer models may incorporate smart chargers with advanced features like automatic voltage detection and charging profile optimization.
Identifying your charger type is crucial for troubleshooting. Compatibility issues can arise if an incorrect charger is used. Always refer to your Club Car’s manual or the charger’s label to determine the appropriate charger for your specific golf cart configuration.
Voltage Compatibility: 36V, 48V, and Beyond
Club Car golf carts commonly operate on 36V or 48V systems, but newer, high-performance models may utilize even higher voltages. Using a charger with an incompatible voltage can cause severe damage to the batteries and the charging system. Always verify the voltage of your cart’s battery pack before connecting a charger.
A 36V charger should only be used with a 36V system, and a 48V charger with a 48V system. Mismatched voltages can lead to undercharging or overcharging, significantly reducing battery life and potentially creating a safety hazard. Confirm compatibility before each use!
Common Club Car Charger Problems
Frequent issues include chargers failing to power on, displaying no charging indication, charging slowly, or stopping prematurely – all impacting your cart’s usability.
Charger Not Receiving Power
If your Club Car charger shows no signs of life, the initial step involves verifying the power source. Begin by checking if the outlet is functioning correctly by plugging in another device. A voltage tester can confirm power delivery to the outlet itself. Next, meticulously inspect the charger cord and plug for any visible damage, such as cuts, fraying, or bent pins.
Loose connections are also a common culprit; ensure the plug is firmly seated in the outlet. A tripped circuit breaker or blown fuse within the charging circuit can also prevent power flow. Remember that many Club Car problems stem from poor contact or voltage mismatches. Addressing these simple checks can often resolve the issue quickly and efficiently, restoring power to your charger.
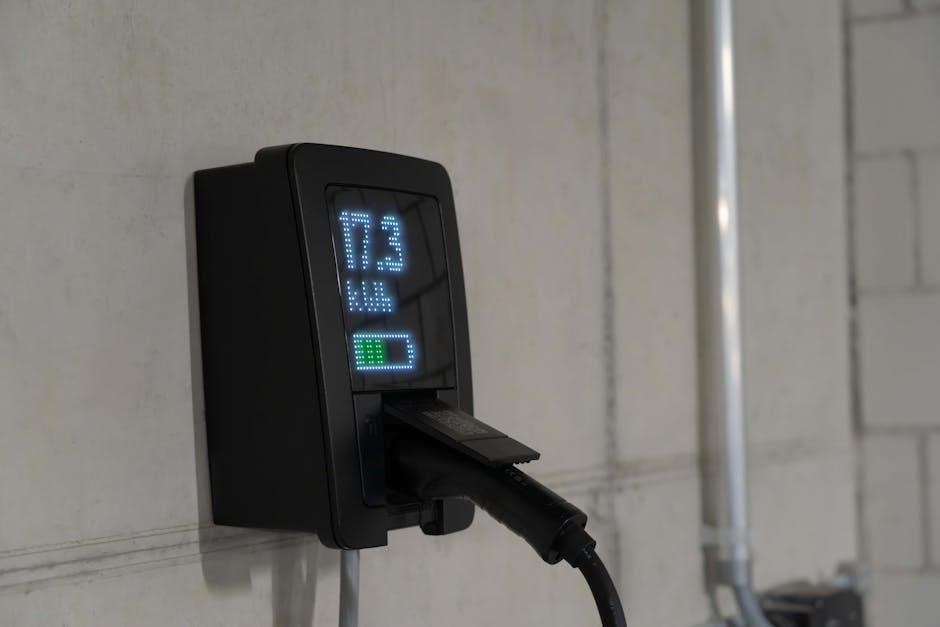
No Charging Indication (Lights/Display)
A lack of lights or display activity on your Club Car charger, even with power confirmed, suggests a deeper issue. This often points towards a problem with the On-Board Computer (OBC), especially in models since 1995, as it regulates charging based on battery voltage. The OBC essentially “tells” the charger when to start and stop.
However, before assuming OBC failure, check all battery connections for corrosion or looseness. A faulty connection can interrupt the signal to the OBC. Inspect the charger’s internal fuse as well. If the OBC is suspected, note any error codes displayed (if applicable) as these provide valuable diagnostic clues. Resetting the OBC might resolve minor glitches.
Slow Charging Issues
Experiencing significantly longer charging times with your Club Car can indicate several underlying problems. A primary suspect is battery sulfation – a buildup of lead sulfate crystals reducing battery capacity and acceptance of charge. Regularly equalizing the battery charge can help reverse this process.
However, also investigate potential voltage mismatches between the charger and the battery pack. Ensure the charger is correctly configured for your battery voltage (36V, 48V, etc.). Poor contact at the plug or corroded battery terminals also contribute to slow charging. Finally, a failing charger component might be delivering insufficient current.
Charger Stops Charging Prematurely
If your Club Car charger halts operation before reaching a full charge, the On-Board Computer (OBC) is often the culprit. Since 1995, 48-volt models utilize an OBC to regulate charging based on battery voltage levels. A malfunctioning OBC might incorrectly interpret voltage readings, prematurely signaling the charger to stop.
However, don’t immediately assume OBC failure. Check battery health; severely degraded or sulfated batteries can trigger premature shut-off. Inspect battery connections for looseness or corrosion, hindering proper current flow. A faulty charger component could also be the cause, requiring further diagnostics with a multimeter.

Troubleshooting Steps
Begin with simple checks: power source, cord integrity, fuse condition, and battery connections. A systematic approach, utilizing a multimeter, will pinpoint the root cause.
Checking the Power Source & Outlet
Ensuring a reliable power supply is the first crucial step in troubleshooting a Club Car charger. Begin by verifying the outlet itself is functioning correctly. Test it with another device to confirm it delivers power. If the outlet is controlled by a switch, ensure that switch is in the ‘on’ position.
Next, inspect the circuit breaker or fuse box associated with that outlet. A tripped breaker or blown fuse will interrupt power flow. Reset the breaker or replace the fuse with one of the correct amperage. Always prioritize safety when working with electrical systems. If issues persist, consider testing the voltage at the outlet using a multimeter to confirm it matches the charger’s requirements. A stable and appropriate voltage is essential for proper charging.
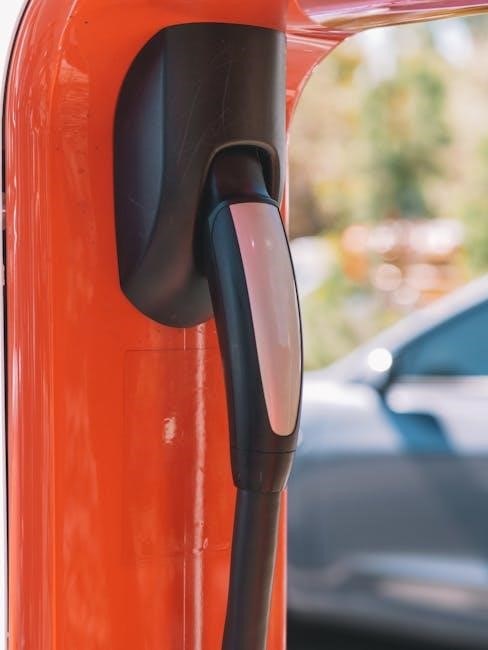
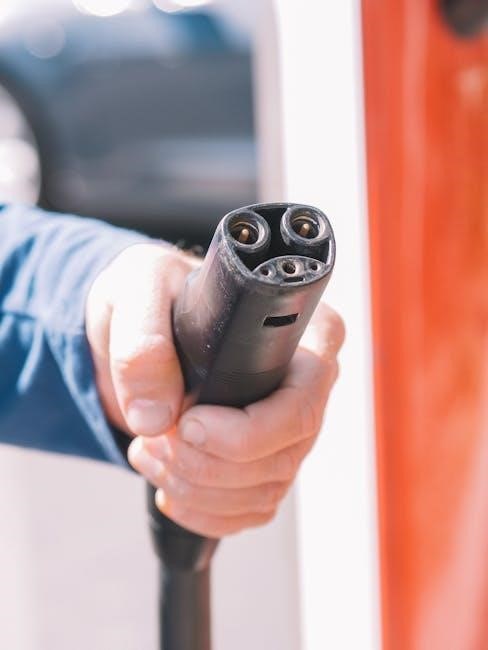
Inspecting the Charger Cord and Plug
A damaged cord or plug can easily prevent charging, so a thorough inspection is vital. Carefully examine the entire length of the charger cord for any visible signs of wear and tear, such as cuts, fraying, or exposed wires. Pay close attention to areas near the plug and where the cord enters the charger housing, as these are common stress points.
Next, inspect the plug itself. Look for bent or broken pins, corrosion, or loose connections. Ensure the plug is firmly seated in the outlet and the cart’s charging receptacle. A poor connection can cause intermittent charging or prevent charging altogether. If damage is found, the cord or plug may need replacement for safe and effective operation.
Testing the Charger Fuse
The charger fuse is a critical safety component, protecting against power surges and internal faults. Before proceeding with more complex troubleshooting, always check the fuse. Locate the fuse holder, typically found on the charger’s housing. Remove the fuse and visually inspect it; a blown fuse will often have a broken filament or a dark discoloration.
Use a multimeter to confirm the fuse’s condition. Set the multimeter to continuity mode and test across the fuse terminals. A good fuse will show continuity, while a blown fuse will not. Replace any blown fuse with a fuse of the exact same amperage rating. Using an incorrect fuse can damage the charger or create a safety hazard.
Examining the Battery Connections
Poor battery connections are a frequent cause of charging problems. Begin by visually inspecting all battery terminals for corrosion, dirt, or loose connections. Clean corroded terminals with a wire brush or a specialized battery terminal cleaning tool, ensuring a bright, metal-to-metal contact.
Tighten all connections securely, but avoid over-tightening, which can damage the terminals. Check the wiring harness connecting the charger to the batteries for any frayed wires or loose connectors. Ensure the charger’s connector is fully seated onto the battery pack. A weak or intermittent connection can prevent proper charging and lead to premature charger shutdown.
Battery Specific Issues
Addressing battery health is crucial; issues like sulfation and voltage imbalances significantly impact charging efficiency and overall golf cart performance.
Battery Voltage Levels
Maintaining correct battery voltage is paramount for optimal Club Car performance and charging. A fully charged 36V system typically reads around 6.3 volts per battery, while a 48V system should show approximately 8.4 volts per battery. Regularly check individual battery voltages using a multimeter to identify weak cells. Significant discrepancies indicate a problem requiring attention, potentially leading to charging failures or reduced range.
Low voltage can trigger the On-Board Computer (OBC) to prematurely stop charging, believing the batteries are full. Conversely, overvoltage can damage the batteries. Consistent monitoring and equalization charging, as needed, are vital for extending battery life and ensuring reliable operation of your Club Car.
Sulfation and Battery Health
Sulfation, a primary cause of battery failure, occurs when lead sulfate crystals build up on the battery plates during inactivity or undercharging. This reduces the battery’s ability to accept and deliver power, diminishing its overall capacity and lifespan. Regular, full charging cycles are crucial to prevent sulfation.
Symptoms include slow charging, reduced run time, and a noticeable drop in voltage. Desulfation chargers or equalization charges can sometimes reverse mild sulfation, but severely sulfated batteries may require replacement. Proactive maintenance, including proper storage during off-season and avoiding deep discharges, significantly improves battery health and longevity.
Equalizing Battery Charge
Equalization is a controlled overcharge designed to restore balance among individual batteries in a series circuit, common in Club Car golf carts. This process breaks down sulfation, mixes electrolyte, and identifies weak cells. It’s typically performed after prolonged periods of inactivity or when batteries exhibit uneven voltage readings.
However, equalization can generate explosive hydrogen gas, so it must be done in a well-ventilated area. Modern chargers often have an equalization mode; otherwise, a specialized charger or a carefully monitored extended charge can be used. Always consult your battery manufacturer’s recommendations before attempting equalization, as improper execution can damage the batteries.
Battery Terminal Cleaning
Corrosion on battery terminals significantly hinders charging efficiency and can lead to charger malfunctions. Regularly cleaning these terminals is crucial for optimal performance. Disconnect the battery cables – negative first – before commencing cleaning. A mixture of baking soda and water effectively neutralizes acid buildup; apply with a wire brush, scrubbing thoroughly.
Rinse with clean water and dry completely. Applying a terminal protectant spray after cleaning prevents future corrosion. Ensure connections are tight after reassembly, as loose connections create resistance and impede charging. Inspect cables for fraying or damage and replace as needed for a reliable charging system.
OBC Troubleshooting
The On-Board Computer (OBC) regulates charging, and issues often manifest as error codes; resetting or testing its functionality are key diagnostic steps.
OBC Error Codes and Meanings
Decoding error codes emitted by your Club Car’s On-Board Computer (OBC) is crucial for pinpointing charging problems. These codes signal specific faults within the charging system, guiding you towards the root cause. While specific codes vary by model year, common indicators relate to battery issues – low voltage, sulfation, or a failing battery pack.
Other codes might point to charger malfunctions, such as a faulty transformer or rectifier. A flashing code sequence often requires referencing the Club Car technical manual for precise interpretation. Ignoring these signals can lead to further damage or premature battery failure. Understanding these codes empowers proactive maintenance and prevents costly repairs, ensuring your cart remains reliably charged and ready for use.
OBC Reset Procedures
Performing an OBC reset can often resolve minor charging glitches and restore functionality. Typically, this involves disconnecting the battery pack from the cart, then reconnecting it after a short interval – usually several minutes. This allows the OBC to clear its memory and re-establish communication with the batteries and charger.
However, be cautious, as a reset will erase any stored charging data. For more complex issues, a specific reset sequence, detailed in the Club Car service manual, might be necessary. Always consult the manual before attempting a reset, and ensure the charger is disconnected during the process to prevent electrical hazards. A successful reset can often save a service call.
Testing OBC Functionality
Assessing the On-Board Computer’s (OBC) performance is crucial for diagnosing charging problems. Begin by verifying the OBC receives power when the charger is connected. Observe if the OBC initiates the charging sequence, indicated by relay clicks or display activity. A multimeter can test voltage at the OBC terminals to confirm proper power distribution.
If the OBC fails to activate, or displays error codes, further investigation is needed; Checking the connections between the OBC, batteries, and charger is essential. A faulty OBC often prevents charging, even with a functional charger and healthy batteries, necessitating replacement or professional repair.
Advanced Troubleshooting
For complex issues, utilize a multimeter to pinpoint faulty components within the charger, potentially requiring replacement for optimal functionality and sustained performance.
Using a Multimeter for Diagnostics
A multimeter is invaluable for in-depth Club Car charger troubleshooting. Begin by checking AC voltage at the outlet to confirm power delivery. Then, test the charger’s input voltage to ensure it’s receiving the correct power. Next, measure DC voltage at the battery terminals while charging; discrepancies indicate potential issues.
Continuity testing can identify broken wires or faulty connections within the charger’s circuitry. Carefully examine the transformer, diodes, and other components for shorts or opens. Remember to disconnect power before probing internal components. Accurate readings will guide you towards isolating the root cause of the charging problem, enabling targeted repairs and restoring functionality to your Club Car’s charging system.
Identifying Faulty Charger Components
Pinpointing failing parts requires systematic inspection. Begin with the visual check – look for burnt components, bulging capacitors, or cracked housings. The transformer is a common failure point; test its windings for continuity. Diodes can be tested with a multimeter’s diode test function, revealing shorts or opens.
Rectifiers and voltage regulators are also frequent culprits. Carefully examine the circuit board for any signs of damage. If a component tests faulty, replacement is often necessary. Remember safety precautions when handling electrical components, and always disconnect power before disassembly. Accurate identification ensures effective repairs.
Replacing Charger Components
Component replacement demands precision and safety. Always disconnect the charger from power before starting. When removing faulty parts, note their orientation for correct installation of the new ones. Soldering skills are often required for circuit board repairs; ensure clean, secure connections.
Source replacement parts from reputable suppliers to guarantee compatibility and quality. After installation, thoroughly inspect your work for shorts or loose connections. Before reconnecting to power, double-check all wiring. Testing the charger post-repair is crucial to confirm functionality and prevent further issues. Prioritize safety throughout the process.
Safety Precautions
Prioritize safety when working with electrical systems and battery acid; wear protective gear, disconnect power, and store chargers properly to avoid hazards.
Working with Electrical Systems
Electrical safety is paramount when troubleshooting your Club Car charger. Always disconnect the charger from both the power source and the battery before performing any inspections or repairs. Never work with wet hands or in damp environments, as water conducts electricity. Inspect all wiring for damage – frayed insulation, loose connections, or corrosion – and replace any compromised components immediately.
Be mindful of the potential for short circuits; use insulated tools and avoid touching exposed wires. If you are uncomfortable working with electrical systems, consult a qualified technician. Remember that even a seemingly minor electrical shock can be dangerous. Prioritize caution and follow all safety guidelines to prevent injury and ensure a successful repair.
Battery Acid Handling
Battery acid is a corrosive substance requiring extreme caution. Always wear appropriate personal protective equipment (PPE), including safety glasses, gloves, and an apron, when working near batteries. If acid comes into contact with skin or eyes, immediately flush the affected area with copious amounts of water for at least 15 minutes and seek medical attention.
Neutralize any spills with baking soda and water, then dispose of the mixture properly according to local regulations. Avoid contact between battery acid and metal objects, as this can create sparks and potentially ignite flammable gases. Keep a supply of baking soda readily available in your work area for emergency spill cleanup.
Proper Charger Storage
To maximize the lifespan of your Club Car charger, proper storage is crucial when not in use. Store the charger in a clean, dry, and well-ventilated area, protected from extreme temperatures and direct sunlight. Avoid storing it in damp or humid environments, as this can lead to corrosion of internal components.
Ensure the power cord is neatly coiled and secured to prevent damage. Disconnect the charger from the power outlet when storing it. Regularly inspect the cord and plug for any signs of wear or damage before each use. Proper storage helps maintain optimal performance and prevents potential hazards.

Frequently Asked Questions (FAQs)
Explore common queries regarding Club Car charger maintenance, troubleshooting, and repair, alongside valuable resources for parts and ensuring optimal golf cart performance.
Club Car Charger Maintenance Schedule
Establishing a routine maintenance schedule is crucial for prolonging the life of your Club Car charger and ensuring consistent performance. Monthly, visually inspect the charger cord for any signs of damage – cracks, fraying, or exposed wires – and replace if necessary. Every three months, thoroughly clean the battery terminals with a wire brush to remove corrosion, ensuring a solid electrical connection.
Semi-annually, check the charger fuse for continuity using a multimeter; a blown fuse indicates a potential internal issue. Annually, a more detailed inspection is recommended, including verifying the voltage output of the charger with a multimeter to confirm it aligns with your battery pack’s specifications. Consistent adherence to this schedule minimizes downtime and maximizes the charger’s efficiency, keeping your Club Car ready for use.
Resources for Parts and Repair
Finding reliable parts and repair services is essential when addressing Club Car charger issues. Several online retailers specialize in golf cart components, offering a wide selection of chargers, cords, fuses, and OBCs. Wild Yak Inc. is a potential source for specific parts. Local golf cart dealerships often provide repair services and stock common replacement parts.
Additionally, numerous online forums and communities dedicated to golf cart enthusiasts can offer valuable advice and troubleshooting assistance. When sourcing parts, prioritize quality and compatibility with your specific Club Car model and voltage. For complex repairs, consider consulting a qualified technician to ensure safety and proper functionality.