This guide provides step-by-step instructions for assembling wind spinners‚ ensuring stability and balance. Follow the detailed process to enjoy your decorative piece effortlessly.
1.1 Purpose of the Guide
This guide aims to simplify the wind spinner assembly process‚ ensuring users understand each step clearly. It provides a comprehensive‚ user-friendly approach to help individuals assemble their wind spinner efficiently‚ focusing on stability‚ safety‚ and ease of use. Follow these instructions to achieve a professional-level installation and enjoy your decorative piece worry-free.
1.2 Importance of Proper Assembly
Proper assembly ensures your wind spinner functions smoothly‚ remains stable‚ and withstands environmental conditions. Incorrect assembly can lead to imbalance‚ noise‚ or structural failure. Following the guide carefully guarantees longevity‚ safety‚ and optimal performance‚ while also maintaining the aesthetic appeal of your wind spinner. This attention to detail ensures a durable and visually pleasing addition to your outdoor space.
Tools and Materials Required
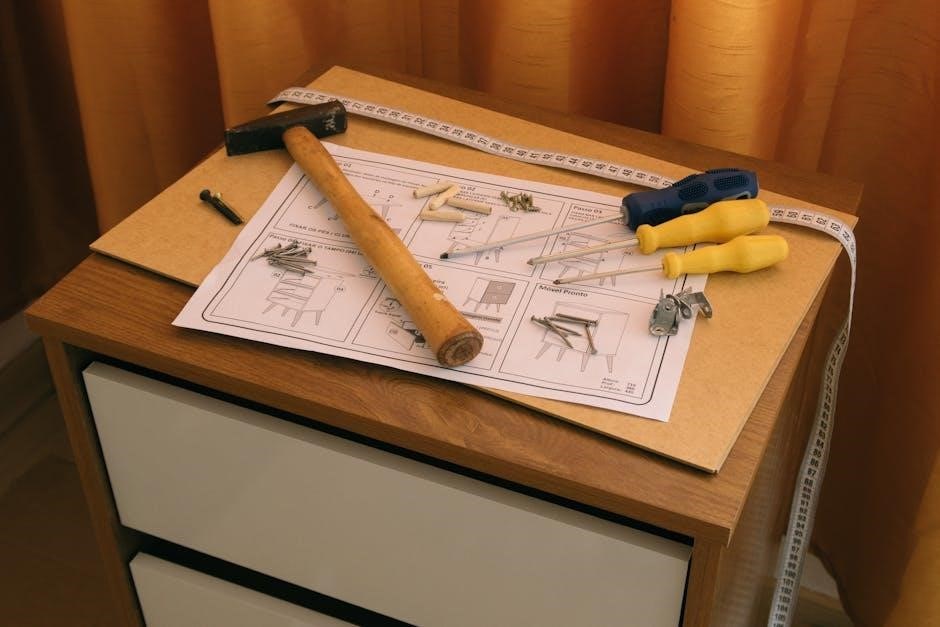
To assemble your wind spinner‚ gather essential tools like screwdrivers‚ a wrench‚ and an Allen key. Ensure all provided materials‚ such as poles and blades‚ are accounted for before starting.
2.1 List of Essential Tools
Essential tools include a screwdriver‚ wrench‚ and Allen key for securing parts. A tape measure ensures accurate pole installation‚ while pliers and a socket set aid in tightening bolts. A marker can help mark installation spots‚ and a ladder may be needed for taller setups. Ensure all tools are readily available to streamline the assembly process and avoid delays.
2.2 Overview of Materials Provided
The wind spinner assembly kit typically includes pre-packaged components such as the base‚ spinner blades‚ central axis‚ bearings‚ and mounting hardware. Additional materials may include screws‚ nuts‚ and bolts for secure assembly. Ensure all parts are accounted for before starting the process to avoid delays. The kit is designed to simplify assembly‚ with labeled components for easy identification and organization.

Understanding the Components
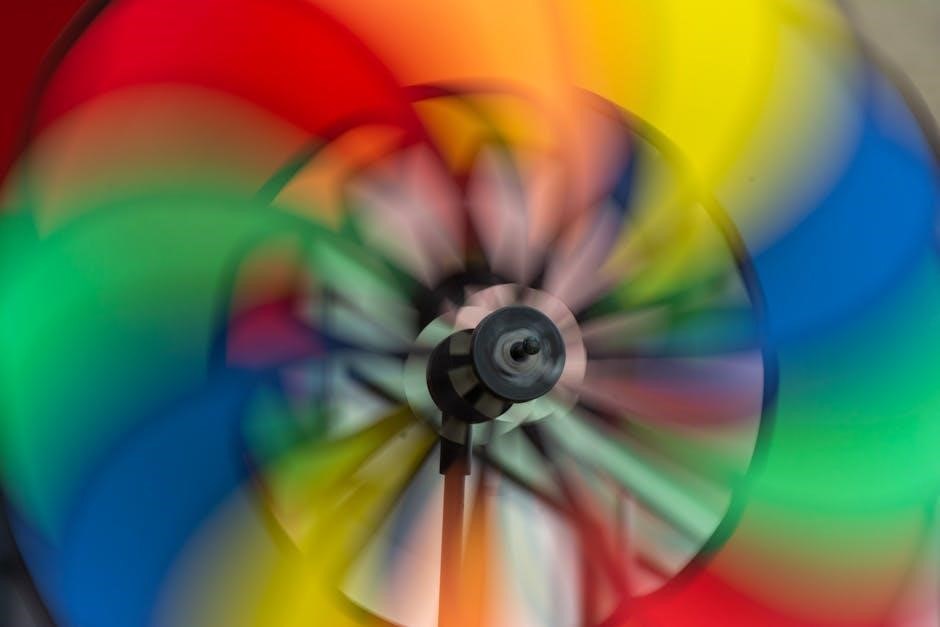
The wind spinner consists of a base‚ blades‚ and an axis with bearings. Each part plays a crucial role in stability‚ movement‚ and overall functionality. Understanding their roles ensures proper assembly and optimal performance.
3.1 Identifying Key Parts
The wind spinner includes essential components such as the base‚ spinner blades‚ central axis‚ and bearings. The base provides stability‚ while the blades catch wind for movement. The axis and bearings ensure smooth rotation. Proper identification of these parts is crucial for accurate assembly and functionality. Matching each piece correctly guarantees the spinner operates efficiently and remains durable over time.
3.2 Diagrams and Visual References
Diagrams and visual references are crucial for understanding the assembly process. They provide clear illustrations of how parts connect and function. Detailed images highlight key connections‚ such as blade attachments and axis alignment. Color-coded components and labeled diagrams ensure accuracy. Referencing these visuals reduces confusion and helps users identify potential errors early. The included PDF templates also offer downloadable guides for precise measurements and alignments.

Safety Precautions
Always wear gloves and protective eyewear when handling sharp or heavy parts. Ensure a stable workspace and avoid over-tightening components. Keep children away during assembly.
4.1 General Safety Tips
- Always wear protective gloves and eyewear when handling sharp or heavy components.
- Ensure the workspace is clean and well-lit to avoid accidents.
- Keep loose clothing and long hair tied back to prevent entanglement.
- Avoid over-tightening parts‚ as this may damage the spinner or cause injury.
- Follow the manufacturer’s guidelines for tool usage and assembly sequences.
4.2 Handling Sharp or Heavy Objects
- Use tongs or tweezers for sharp edges to prevent cuts.
- Lift heavy parts with a second person or use mechanical aids.
- Secure the workpiece firmly to avoid accidental movement.
- Keep children and pets away from sharp or heavy components.
- Wear sturdy gloves when handling metal or glass parts.
- Avoid using blunt tools that may slip and cause injury.
Step-by-Step Assembly Process
Follow the guide to build your wind spinner‚ starting with the base‚ attaching blades‚ and securing the axis for smooth rotation and stability.
5.1 Base Installation
Begin by selecting a flat‚ stable site for the wind spinner. Dig a hole for the base pole‚ ensuring it’s level and secure. Insert the base‚ fill the hole‚ and compact the soil. Anchor the base firmly to prevent movement. Use provided hardware to stabilize the structure‚ ensuring a solid foundation for the spinner’s operation.
5.2 Attaching the Spinner Blades
Align each blade with the designated slots on the hub. Secure them using the provided screws or clips. Tighten firmly but avoid over-tightening. Ensure blades are evenly spaced for balanced rotation. Double-check alignment to prevent wobbling; Once all blades are attached‚ test the spinner’s movement to confirm smooth operation and proper balance.
5.3 Securing the Axis and Bearings
Insert the axis into the base and align it with the designated holes. Attach the bearings to the axis‚ ensuring they fit snugly. Apply a small amount of lubricant to the bearings for smooth rotation. Tighten the screws firmly to secure the axis in place. Double-check the alignment and stability to ensure proper movement. Make sure all parts are tightly fastened to prevent any wobbling or noise during operation.

Mounting and Balancing the Spinner
Mount the spinner in an open area for optimal performance. Secure the pole deeply in the ground and use zip ties for added stability‚ ensuring proper balance.
6.1 Choosing the Right Location
Selecting a suitable location for your wind spinner is crucial. Opt for an open area with consistent airflow to maximize its spinning motion. Avoid obstructed spaces or low-hanging branches that may interfere with performance. Ensure the ground is firm and level to prevent instability. Consider proximity to gardens or walkways to enhance visual appeal while maintaining functionality and safety.
6.2 Ensuring Proper Balance
Proper balance is essential for smooth operation. Check that all components are securely fastened and aligned. Use the provided balancing kit or adjust the spinner’s axis if necessary. Ensure no weights are unevenly distributed‚ as this could cause wobbling. Test the spinner in mild winds to confirm stability. Make adjustments until it spins evenly without swaying or tilting‚ guaranteeing optimal performance and longevity of the unit.

Post-Assembly Checks
After assembling‚ inspect all connections for tightness and alignment. Test the spinner’s movement in gentle winds to ensure smooth rotation and stability‚ verifying all parts function correctly.
7.1 Testing the Spinner’s Movement
After assembly‚ gently observe the spinner in light wind to ensure smooth rotation. Check for any wobbling or noise‚ which may indicate imbalanced blades or loose parts. Verify that all components move freely without obstruction. If issues arise‚ refer to the troubleshooting section for solutions. Proper movement ensures optimal performance and longevity of your wind spinner.
7.2 Verifying Stability and Alignment
Ensure the spinner’s base is level and securely anchored to prevent tilting. Check the vertical alignment of the axis and blades for proper balance. Tighten any loose fasteners and confirm that all parts are evenly spaced. Correct alignment ensures the spinner operates smoothly and maintains its aesthetic appeal. Regular checks help prevent damage from uneven wear or environmental stress.

Maintenance and Upkeep
Regularly clean the spinner blades and lubricate moving parts to ensure smooth operation. Check for loose screws and tighten them to maintain stability and functionality.
8.1 Cleaning the Spinner
Regular cleaning ensures optimal performance and longevity. Use mild soap and water to wipe down blades and surfaces. Avoid abrasive materials that may scratch finishes.
For tougher dirt‚ mix baking soda and water to create a gentle paste. Apply with a soft cloth‚ rinse thoroughly‚ and dry to prevent rust. This maintenance step keeps your spinner looking new and functioning smoothly.
8.2 Lubricating Moving Parts
Lubricate the spinner’s moving parts regularly to ensure smooth operation; Use a silicone-based spray or oil on the axis and bearings. Apply a small amount‚ then wipe off any excess with a clean cloth. This prevents friction and corrosion‚ extending the spinner’s lifespan. Avoid over-lubrication‚ as it may attract dust and dirt‚ potentially causing imbalance or noise during rotation. Proper lubrication maintains efficiency and keeps the spinner spinning effortlessly.

Troubleshooting Common Issues
Address wobbling by tightening loose parts or adjusting balance. Resolve noise by lubricating moving components or replacing worn bearings. Regular checks ensure smooth operation.
9.1 Addressing Wobbling or Noise
Check the base for stability and tighten any loose connections. Ensure spinner blades are evenly spaced and not bent. Lubricate the axis and bearings if noise persists. Verify all parts are securely fastened and aligned properly. Regular inspections and adjustments will help maintain smooth operation and prevent future issues.
9.2 Fixing Loose Parts
Inspect all bolts and screws for tightness‚ as loose components can cause instability. Tighten any loose connections using the provided tools. If parts remain loose‚ apply a threadlocker or replace worn-out fasteners. Ensure the spinner’s axis and bearings are securely attached. Refer to the assembly manual for specific torque recommendations to avoid over-tightening‚ which may damage the spinner’s mechanism.
Customization Options
Personalize your wind spinner with sublimation printing for vibrant designs or use templates for precise patterns‚ ensuring a unique and visually appealing backyard decoration.
10.1 Painting or Decorating the Spinner
Enhance your wind spinner’s appearance by painting or decorating it with vibrant colors or patterns. Use weather-resistant paints or sublimation templates for durable‚ long-lasting designs. Apply a clear sealant to protect the finish from outdoor elements‚ ensuring your spinner remains visually striking for years. Personalize it to match your garden’s aesthetic for a unique and eye-catching display.
10.2 Adding Personalized Features
Add unique touches to your wind spinner‚ such as engravings‚ ornaments‚ or LED lights‚ to make it truly one-of-a-kind. Use sublimation templates or paint to create intricate designs. Consider attaching small decorative items like beads or reflective materials for extra flair. These personal touches will make your spinner stand out and reflect your personal style‚ adding character to your outdoor space with minimal effort. Ensure additions are weather-resistant for longevity.
This guide provides comprehensive steps for assembling and personalizing your wind spinner. By following these instructions‚ you can enjoy a beautifully crafted‚ functional‚ and unique outdoor decoration with ease.
11.1 Summary of Key Steps
Begin by unpacking and organizing all components. Assemble the base securely‚ attach the spinner blades evenly‚ and ensure the axis and bearings are properly aligned. Mount the spinner in a balanced location‚ test its movement‚ and verify stability. Perform post-assembly checks to ensure everything functions smoothly. Regular maintenance‚ such as cleaning and lubricating moving parts‚ will prolong the spinner’s lifespan and performance. Follow these steps for a successful and enjoyable assembly process.
11.2 Final Tips for Enjoying Your Wind Spinner
To fully enjoy your wind spinner‚ place it in an open area with consistent airflow. Ensure it’s securely anchored to prevent damage in strong winds. Regularly inspect and tighten loose parts‚ and consider adding a protective coating to withstand harsh weather. Customize its appearance with paint or decorations to match your outdoor decor. Proper care and maintenance will ensure your wind spinner remains a beautiful and functional garden feature for years to come.