Honeywell programmable thermostats offer energy efficiency, customization, and smart features, enabling users to optimize heating and cooling schedules for comfort and cost savings.
1.1 Overview of Honeywell Programmable Thermostats
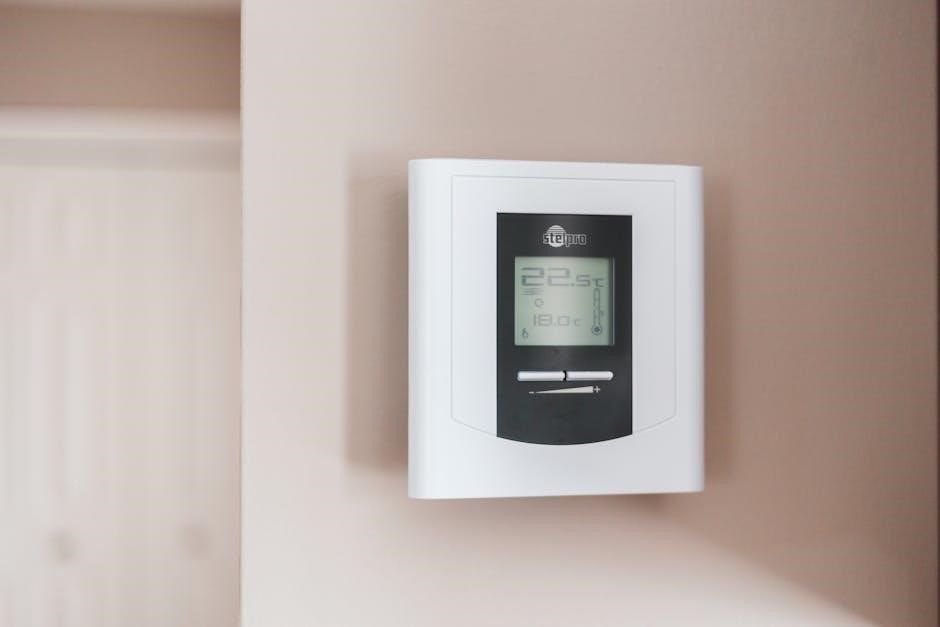
Honeywell programmable thermostats are designed to offer precise temperature control, energy efficiency, and ease of use. Available in various models like the RTH2520, RTH7500D, and T9 Smart Thermostat, these devices provide customizable scheduling options. They feature large, backlit displays for easy navigation and compatibility with different heating and cooling systems. Some models include smart home integration, allowing remote access via smartphones. These thermostats are known for their user-friendly interfaces and step-by-step programming guides, making them ideal for both residential and light commercial use.
1.2 Benefits of Using a Programmable Thermostat
Using a programmable thermostat offers numerous benefits, including energy savings, consistent comfort, and convenience. By setting schedules, users can automatically adjust temperatures during peak and off-peak times, reducing energy consumption. This leads to lower utility bills and a smaller environmental footprint. Programmable thermostats also eliminate the need for manual adjustments, ensuring optimal temperatures throughout the day. Additionally, features like remote access and smart home integration enhance control, making it easier to manage energy usage efficiently.

Honeywell RTH2520 Programmable Thermostat
The Honeywell RTH2520 is a versatile programmable thermostat designed to control gas, fuel oil, or electric heating systems. It features a large, backlit display for easy operation and offers pre-programmed settings to simplify use. The thermostat is energy-efficient, allowing users to customize temperature schedules and reduce energy consumption. Its intuitive design makes it a reliable choice for homeowners seeking precise climate control.
2.1 Features of the RTH2520 Model
The Honeywell RTH2520 model boasts a backlit display for easy readability and supports gas, oil, or electric heating systems. It offers pre-programmed settings for simplicity and features a universal design compatible with most HVAC systems. The thermostat includes a 5-2 day programming option, allowing users to set different schedules for weekdays and weekends. Its energy-saving design helps reduce utility bills, and the large, intuitive interface ensures hassle-free temperature adjustments. This model is ideal for homeowners seeking reliable, efficient climate control without advanced smart features.
2.2 Installation Requirements for RTH2520
The Honeywell RTH2520 requires a 4-wire heating and cooling system connection. It is compatible with gas, oil, or electric systems but does not need a C-wire for operation. Ensure the wallplate is level for proper installation, though functionality isn’t affected by slight tilts. Mark mounting holes with a pencil and drill pilot holes if necessary. Turn off power at the circuit breaker before wiring. The thermostat is pre-programmed and ready for use after setting the time and day, making it a straightforward installation process.

Honeywell RTH7500D Programmable Thermostat
The Honeywell RTH7500D features a large 5.44-square-inch backlit display for easy readability. It is pre-programmed and ready for use, requiring only the setup of time and day.
3.1 Key Features of the RTH7500D Model
The RTH7500D offers a 7-day programmable schedule and a 5.44-inch backlit display for clear visibility. It is compatible with various heating and cooling systems, including gas, oil, and electric, providing versatility for different home setups. The thermostat also features automatic changeover between heating and cooling modes, ensuring optimal comfort. Its energy-saving design allows users to customize temperature settings, reducing energy consumption without sacrificing comfort. The device is easy to install and use, making it a practical choice for homeowners seeking efficient temperature control.
3.2 Setup and Operation Instructions
To set up the RTH7500D, begin by installing the thermostat and ensuring all wiring connections are secure. The device is pre-programmed, so simply set the time and day. Review the default settings and adjust as needed to match your schedule. The thermostat features a backlit display that illuminates when buttons are pressed, providing clear visibility. For operation, use the buttons to navigate through menus and adjust temperature settings. The thermostat automatically switches between heating and cooling modes based on your programmed preferences, ensuring efficient operation year-round.

Honeywell T9 Smart Thermostat
The Honeywell T9 Smart Thermostat offers advanced smart features, including compatibility with Google Assistant and Alexa, enabling seamless voice control and smart home integration for enhanced convenience.
4.1 Smart Features and Compatibility
The Honeywell T9 Smart Thermostat features geofencing, smart alerts, and energy usage reports. It is compatible with Google Assistant and Alexa, allowing voice control and seamless integration into smart home systems. The thermostat also supports remote access via the Honeywell Home app, enabling users to adjust settings from anywhere. Its compatibility extends to various HVAC systems, ensuring versatility for different home setups and energy-efficient performance.
4.2 Integration with Google Assistant and Alexa
The Honeywell T9 Smart Thermostat seamlessly integrates with Google Assistant and Alexa, enabling voice control for temperature adjustments. Users can link their thermostat to these platforms through the Honeywell Home app by enabling the respective skills. This allows for hands-free commands, such as “Set the living room to 72 degrees,” enhancing convenience. The integration also supports smart home routines, making it easier to manage energy usage and maintain a comfortable environment effortlessly.

Installation and Mounting Guidelines
Mounting Honeywell thermostats requires leveling the wallplate and marking holes. Use a pencil to ensure proper alignment, then secure the plate and thermostat firmly.
5.1 Preparing the Wall and Positioning the Thermostat
Begin by ensuring the wall is level and clear of obstructions. Position the thermostat’s wallplate in the desired location, marking the mounting holes with a pencil. Ensure the device is centered and aligned properly. If necessary, check for any electrical components or wiring behind the wall. Gently pull the thermostat away from the wallplate to access the wiring area. This preparation ensures a secure and professional installation, avoiding any potential damage or misalignment.
5.2 Wiring and Mounting the Wallplate
Mount the wallplate by screwing it into the pre-marked holes, ensuring it is level for proper installation. Connect the wires to the corresponding terminals, following the manual’s wiring diagram. Secure the thermostat to the wallplate by aligning the tabs and gently pressing until it clicks. Turn the power back on and test the device to ensure functionality. Proper wiring and mounting ensure reliable performance and safety. Always refer to the manual for specific wiring instructions to avoid errors.
Programming Your Honeywell Thermostat
Programming your Honeywell thermostat involves setting the time, creating a weekly schedule, and adjusting temperature settings to optimize comfort and energy efficiency throughout the day.
6.1 Setting the Time and Day
To start programming, turn the dial to select the current time and day. Use the next/previous buttons to adjust the time accurately. Ensure the time format (12 or 24 hour) matches your preference. After setting, press Done to save. If your thermostat has a C wire, the display will stay lit for 45 seconds after changes. This step ensures your schedule runs correctly and efficiently.
6.2 Creating a Weekly Schedule
Press Menu and navigate to Schedule using the NEXT or PREV buttons.
Select the day(s) you want to program and choose Period to set the time and temperature.
Use the UP and DOWN arrows to adjust the time and desired temperature.
Repeat for each period (e.g., Wake, Leave, Return, Sleep).
Press Done to save your schedule. This ensures consistent temperature control throughout the week.
6.3 Adjusting Temperature Settings
To adjust temperature settings, press the UP or DOWN arrows on the thermostat. For the current period, select Hold to override the schedule temporarily. For permanent changes, go to Menu > Temperature and adjust the setpoints. Ensure the changes are saved by pressing Done. This allows precise control over heating and cooling, optimizing comfort and energy use. Always review settings before saving to confirm accuracy.
Advanced Features and Customization
Honeywell thermostats offer advanced features like energy-saving modes, smart home integration, and remote access, allowing users to customize settings for optimal performance and efficiency.
7.1 Energy-Saving Modes and Settings
Honeywell programmable thermostats feature energy-saving modes such as auto-changeover and smart recovery. These settings optimize heating and cooling cycles, reducing energy waste. Users can also set temperature limits and program schedules to minimize usage during off-peak times, enhancing efficiency without sacrificing comfort. The thermostats often include energy reports, providing insights to further refine settings for maximum savings. These features make Honeywell thermostats a cost-effective and eco-friendly choice for homeowners.
7.2 Smart Home Integration and Remote Access
Honeywell programmable thermostats seamlessly integrate with smart home systems, allowing voice control via Google Assistant and Alexa. Remote access through Honeywell’s app enables users to adjust settings, monitor energy usage, and receive alerts from anywhere. This connectivity ensures optimal comfort and energy efficiency, even when users are away from home. The thermostats also support geofencing, automatically adjusting temperatures based on location, further enhancing convenience and energy savings.

Troubleshooting Common Issues
Troubleshooting Honeywell programmable thermostats involves checking wiring connections, ensuring proper power supply, and resetting the device if display or connectivity issues arise. Regular updates help resolve software-related problems, while consulting the user manual provides detailed solutions for specific malfunctions. Addressing these issues promptly ensures consistent performance and energy efficiency.
8.1 Resolving Display or Lighting Problems
If the display is dim or unresponsive, check the power source and ensure proper wiring connections. For models with a C wire, the screen stays lit for 45 seconds after changes. If issues persist, reset the thermostat by removing batteries or toggling the circuit breaker. Clean the screen gently with a soft cloth to avoid scratches. Refer to the manual for specific instructions on troubleshooting display-related malfunctions to restore functionality efficiently.
8.2 Addressing Connectivity or Wi-Fi Issues
For Honeywell smart thermostats, ensure stable internet connection and proper Wi-Fi network configuration. Restart the router and thermostat to refresh the connection. Check for firmware updates, as outdated software may cause issues. Verify network compatibility and signal strength. If problems persist, reset the thermostat to factory settings and re-pair it with your network. Consult the user manual for detailed troubleshooting steps to restore connectivity and remote access functionality.

Maintenance and Care Tips
Regularly clean the thermostat’s display and sensors to ensure accuracy. Update software periodically for optimal performance. Refer to the manual for specific maintenance instructions.
9.1 Cleaning the Thermostat
To clean your Honeywell programmable thermostat, use a soft cloth to gently wipe the display and exterior. Avoid harsh chemicals or liquids, as they may damage the screen. For deeper cleaning, turn off the power and carefully remove the faceplate. Use compressed air to blow out dust from vents and internal components. Regular cleaning ensures optimal performance and prevents debris from affecting temperature readings and functionality.
9.2 Updating Software and Firmware
To ensure your Honeywell programmable thermostat operates at peak performance, regular software and firmware updates are essential. Check for updates through the Honeywell Home app or the thermostat’s menu. Connect your device to Wi-Fi for automatic updates or manually download updates from the Honeywell website. Follow on-screen instructions carefully to avoid interruptions. After updating, restart your thermostat to apply changes. Keeping your system up-to-date enhances functionality, security, and compatibility with smart home integrations.
Honeywell programmable thermostats deliver energy efficiency, smart features, and ease of use, offering a reliable solution for home comfort and cost savings year-round.
10.1 Summary of Key Features and Benefits
Honeywell programmable thermostats like the RTH2520 and RTH7500D offer advanced features such as energy-saving modes, smart home integration, and compatibility with Google Assistant and Alexa. They provide easy scheduling, remote access via apps, and large, backlit displays for convenience. These thermostats support various heating and cooling systems, ensuring versatile installation options. Their programmable settings help reduce energy consumption, while features like geofencing and voice control enhance user experience. Regular software updates ensure optimal performance and compatibility with modern smart home systems. These thermostats are designed to balance comfort, efficiency, and innovation seamlessly.
10.2 Final Tips for Optimal Performance
For optimal performance, regularly update your Honeywell thermostat’s software and clean the display to ensure accuracy. Properly mount the device on a level surface and avoid direct sunlight exposure. Schedule yearly maintenance checks and replace batteries as needed to prevent interruptions. Use energy-saving modes and geofencing to maximize efficiency. Always refer to the user manual for specific model instructions, and ensure compatibility with your HVAC system for seamless operation. These steps will enhance functionality and extend the lifespan of your thermostat.